Guides
Everything you need to get booked.
Step-by-step guides for setting up your booking page, filling your schedule and running it day to day. Written for owners, not developers — nothing here needs code.
Three steps and you are taking bookings.
-
1
Create your business
Your name and an email address. No password, no card — you land in your dashboard in about two minutes.
Read the guide → -
2
Put your week on the page
Add one session, or set a recurring schedule and let it generate every occurrence for you.
Read the guide → -
3
Share one link
Instagram bio, WhatsApp, a QR on the studio door. Members book with an email code — nothing to install.
Read the guide →
All guides.
Each guide shows the admin as it looks today.
For studio owners.
Running classes well, whatever you use to book them.
Create your business
Your booking page is live in about two minutes. There is no password to choose and no card to enter.
-
1
Open gettingbooked.app and choose “Create your business”
The sign-up panel sits at the bottom of the home page, with a second option — Sign in — for owners who already have a page.
-
2
Enter your business name and email
Those two fields are all it takes. Your public address is generated from the name — “Sunrise Yoga” becomes gettingbooked.app/sunrise-yoga.
Tip: use the name you actually trade under. It becomes your public link, and changing it later means asking us to move it for you. -
3
Enter the 6-digit code from your inbox
We email a one-time code instead of asking you to invent a password. It is valid for 30 minutes, and you can ask for a new one if it lapses.
No email after a minute? Check spam and promotions. Everything we send comes from GettingBooked. -
4
You land in your dashboard — and your page is already live
The admin panel opens on the Slots tab. Your public page exists from this moment; it simply has nothing on it until you add your first session.
Add slots, single or recurring
A slot is one bookable session: a title, a start and end time, and a number of spots. Members see them as soon as you save.
-
1
Open the Slots tab and choose “New slot”
The form slides in from the side, and starts on Single. The toggle at the top switches it to Recurring.
-
2
One session: title, capacity, date, start and end
Capacity is pre-filled from Settings → Default slot capacity, and you can override it here for this session only.
Tip: titles appear on your public page, in the messages members get about a session, and in your monthly stats. Keep them short and reuse the same title week to week — that is what groups a class together in the numbers. -
3
A whole schedule: pick days, a time and a duration
In Recurring mode, choose the weekdays the class runs, one start time and a duration. Then set how far it repeats: a number of weeks from a start date (up to 52), or the specific months the programme runs.
-
4
Check the preview, then save
Before you save, the form lists every session it is about to create and warns you about any that clash with slots you already have. Saving publishes them all at once.
Note: two classes can run at the same time, as long as they have different names. The same class at the same start and end time is only added once. -
5
Find what you need with the range filter
Today, Upcoming, Past and All sit above the list. Each day shows how many spots are booked against the day’s total.

Share your booking page
One link is the whole distribution strategy. Members open it, see this week, and book — no account to create, nothing to install.
-
1
Open the Share tab
It holds your public address — gettingbooked.app/your-name — with a copy button, and a preview link so you can see exactly what members see.
-
2
Download the QR code
A print-ready PNG that opens your booking page when scanned. Put it on the studio door, the reception desk, a flyer or the back of a class card.
-
3
Download the Instagram story image
A ready-made 9:16 image with your name, link and QR — drawn over your cover photo, or over your brand colour if you haven’t added one. Post it as a story and the link is scannable from a friend’s screen.
-
4
Put the link where people already are
Instagram bio, WhatsApp groups, your Google Business profile, your newsletter, your own website. The page is always current, so you never re-share a corrected timetable.

Book someone in yourself
For phone calls, walk-ins and the member who never quite gets round to it — you can fill a seat from the admin panel in a few seconds.
-
1
Find the session in the Slots tab
Every row has a button on the right: Add when nobody is booked yet, or N booked once there are bookings. Either one opens the same panel.
-
2
Pick an existing member, or add a new person
Search your member list — anyone already booked into this session is flagged, so you can’t double-book by accident. For someone new, switch to the new-person form: name is required, and email or phone identifies them.
Tip: an email address is worth asking for. It is what matches a walk-in to their existing record next time — a phone number alone can create a second member if it is typed differently. -
3
Add the booking
It is confirmed immediately and appears in the Bookings tab. If the member is on a session pack, the session is deducted like any other booking.
You are not bound by your own rules here. Bookings you make skip the minimum-notice and booking-horizon limits — you can still add someone to a class starting in five minutes. Capacity is the one limit that holds for a session that hasn't started yet, and a seat held for the next person on the waitlist counts as taken: to add someone now, raise the session's capacity. For a session that's already happened, if it was full you'll be asked to confirm before adding someone beyond capacity — useful for recording someone who attended off-book. -
4
The same panel shows who is in
It lists everyone booked into the session — and anyone on the waitlist, in order — so you can cancel a booking or remove a name without leaving the schedule.

Cancel a booking or a session
One member dropping out, or a whole class you can’t run. Both are a couple of clicks, and everybody affected is told automatically.
-
1
Cancel one booking
In the Bookings tab, find the booking and choose Cancel, then confirm. You can also do it from the session’s own panel in the Slots tab — the one that opens from the N booked button.
-
2
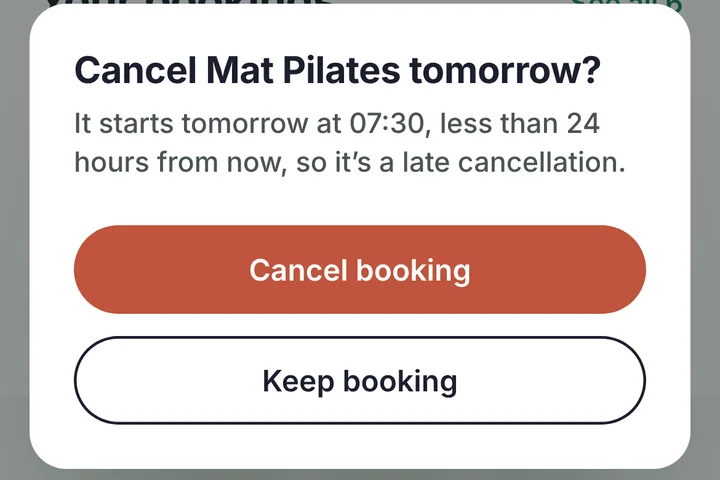
Late cancellations are flagged, not punished
A cancellation inside your late-cancel window is marked Late cancel in the record. On a session pack, a late cancellation does not return the session; an in-time one does.
-
3
Cancel a whole session
Delete the slot from the Slots tab. Everyone booked in is notified for you — you don’t need to send messages yourself.
-
4
For a repeating class, choose how far the cancellation goes
Deleting one occurrence of a recurring schedule asks whether you mean just that session, or this and every future one. Sessions created together as a series are matched exactly; older one-off slots fall back to matching by title, so check the confirmation text before you commit.
Attendance & past sessions
Marking who turned up takes seconds and pays for itself twice: an honest member history, and a no-show rate you can actually trust in your stats.
-
1
Mark attendance from the Bookings tab
Each booking has two marks — attended, or no-show. Tap one after class; you can change it later if you get it wrong.
-
2
Review a past session in the Slots tab
Switch the range to Past. Sessions are listed most recent first with a one-line summary — how many attended, no-showed or cancelled.
-
3
Open one for the full roster
Click a past session to expand it. Everyone is grouped by outcome, with no-shows and cancellations first and attended members tucked under a toggle. It is read-only — there is nothing left to manage.
Tip: your no-show rate on the Stats tab is only as good as these marks. A studio that marks attendance for a month gets a number worth acting on.
Waitlists for full sessions
A full class stops being a dead end. Members queue, and when someone drops out the seat is offered down the queue automatically — at 21:40, without you touching your phone.
-
1
Members join the queue themselves
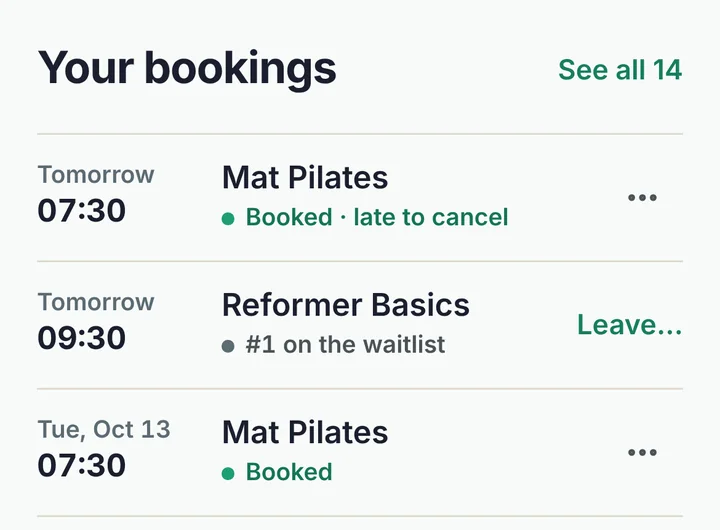
When a session is full, the button on your page reads Join waitlist instead of “Full”. Members see their position, and can leave the queue whenever they like.
-
2
A freed seat is offered and held
The moment a booking is cancelled, the next person in the queue is emailed and the seat is held for them. The hold fits the time left: the time before the last hour is shared between the rounds of offers the queue needs, up to 2 hours each and never under 10 minutes. When there isn’t time for that, the seat goes straight to a last call. The email’s Book this spot button opens a page where they confirm with one tap — no sign-in code. Nothing is asked of you.
-
3
A missed offer moves on, and they stay on the list
If someone doesn’t book in time, the seat passes to the next person. They lose their place in the queue but stay on the list for the last call, shown to you as Passed, and can tap Rejoin the queue to go back in at the end.
-
4
A last call when time is short
In the last hour before bookings close, or once everyone waiting has passed, a freed seat is emailed to everyone on the waitlist at once, and the first to book gets it.
-
5
No offers overnight
From 22:00 to 07:00 in your timezone, offers wait and their clock stops — so for an early-morning class, the last call can come the evening before. Check your timezone in Settings so the quiet hours land at night for you.
-
6
See who is waiting
The Slots tab shows N waiting next to any session with a queue, and opening the session lists everyone in order. In the new admin, a seat held for the waitlist shows who holds it and until when. You can remove someone from the queue there.
Read the queue as a signal. A class with people waiting week after week is the clearest evidence you have that a second session would fill.

Add & manage members
Your member list builds itself — anyone who books is on it. You can also add people by hand when you are moving an existing list across.
-
1
Open the Members tab
Everyone who has ever booked, or been added by you, with their membership status in the row — sessions left on a pack, or an expiry date, without opening anything. Filter to Active, Expiring or No membership, or search by name, email or phone.
-
2
Add someone manually
Choose Add member and fill in a name, plus an email (preferred) or a phone number. Email is what recognises them next time they book for themselves.
-
3
Open a profile to manage them
Click any member for their membership — the plan, the expiry, sessions used and sessions left, counted from their bookings. From here you edit their name, email and phone, assign or change a plan, log a walk-in visit or refund one, and remove the member if you need to.
Renew… continues a plan instead of restarting it: renew a monthly pass five days early and the new month starts where the old one ends, so no paid-for days are lost. You can also pick a different plan in the same dialog; switching to another kind of plan starts it from today, and the dialog says so before you confirm. Members who expire in the next two weeks get a Renew button right in the list.
Renewing a session pack starts a fresh pack from today, and the dialog tells you which days and sessions will be lost. If the member renews before the pack expires and you would rather they keep what is left, turn on Keep the … left in the same dialog: the new days are added after the current expiry date, and the sessions not used yet are added to the new pack. A pack that has already expired always starts fresh.
Below that, Plan history lists every plan they have had — when it was assigned, extended or removed, its dates, and who made the change — so you can see how a member got where they are.
-
4
Keep private notes
Notes live on the profile and are only ever visible to you — “prefers the front row”, “shoulder injury, no inversions”, “pays in cash”. Members never see them.
Your members’ contact details are encrypted at rest — email, phone and notes. Names stay readable so your roster works, but the rest is unreadable without the keys.

Membership plans
Plans are how you say “ten classes in forty days” or “three a week” once, and have every booking counted against it from then on.
- Session pack
- A fixed number of sessions, valid for a set number of days — “10 classes, 60 days”. Each confirmed booking spends one; an in-time cancellation returns it.
- Recurring with cap
- A limit per week or per month — “up to 3 classes a week”. The allowance resets on its own; there is nothing to top up.
- Unlimited subscription
- Book freely until the plan expires. The usual shape of a monthly membership.
-
1
Create a plan in Settings → Membership plans
Give it a name you’ll recognise on a member’s profile (“10-pack / 40 days”), pick the type, and set how many days it stays valid. Packs also take a session count; capped plans take a number and a period.
-
2
Assign it from the member’s profile
Open the member, choose the plan, and save. It starts immediately and the expiry date is worked out for you. Plans you stop selling can be deactivated instead of deleted, so existing members keep theirs.
-
3
Correct a balance by hand when you need to
The profile lets you add or refund sessions on a pack — for the class you ran off the books, or the cancellation you decided to forgive.
-
4
Decide whether plans gate booking
One switch does all of it: Settings → Require active membership to book. On, and a member needs a valid, unexpired plan with sessions left. Off, and nobody is turned away — you can still sell packs and use them purely as a record of what has been paid for.
What your members see
Worth knowing, because it is the half of the product you never look at — and the half that decides whether people actually use it.
-
1
Booking takes an email and a code
A member picks a session, enters their email, and gets a 6-digit code. First time round they add their name and, if they like, a phone number. No password, no app, no account to remember.
-
2
Updates reach them without you sending anything
A bell on your booking page carries the things that matter — a session you cancelled, a waitlist seat that has opened for them, an offer that has run out. The two that can’t wait, a cancelled session and an available spot, are emailed as well, so nobody has to be on the page to hear about them.
-
3
Their profile holds what is coming and what has been
A calendar of upcoming sessions and a record of everything attended. It is also where they see a remaining pack balance or membership expiry, if you have given them a plan.
-
4
They cancel from there too
Directly from an upcoming session, with a confirmation step — and a clear warning when it falls inside your late-cancel window. Fewer messages for you to read at 22:00.
Choose a layout & make it yours
Three templates, seven font pairings and your own colours. Everything lives in Settings → Appearance, and you can switch as often as you like.
- Classic
- Clean and compact. The schedule does the talking — the safest choice if you have no photography.
- Editorial · Sunrise
- A full-bleed photo hero with an expressive serif and lively scrolling. Best when you have one really good picture of your space.
- Studio
- Bold uppercase type, a warm accent and a redesigned date picker. It can also show a “why us” strip — four tiles built from your own settings: class size, cancellation window, membership policy. One switch turns the strip off.
-
1
Pick the layout
Settings → Appearance → Mini-site layout. A preview link next to it opens your live page in a new tab, so you can compare before you commit.
-
2
Set your colours
A brand colour carries buttons, badges and links. A background colour sets the page — dark grounds included; text contrast is adjusted for you.
-
3
Choose a font pairing
Seven pairings — Modern, Classic, Elegant, Rounded, Editorial, Bold and Boutique — each shown as a live sample so you are choosing with your eyes, not from a list of font names.
-
4
Add a cover image
A photo of your space, sitting at the top of your page. Set its focal point — top, centre or bottom — so the crop keeps what matters on phones.
Tip: a wide landscape photo, at least 1200 × 400, holds up best. It is reused in your Instagram story image on the Share tab. -
5
Save — your page updates immediately
No rebuild, no delay. A member refreshing the page sees the new look.

Booking rules & settings
The rules that decide who can book what, and when. Set them once — they apply to every session on your page.
| Setting | What it does |
|---|---|
| Timezone | The timezone every slot time is shown in, on your page and in the admin panel. Times are stored in UTC underneath, so a change here never shifts your schedule. |
| Time format | 12-hour or 24-hour, on your booking page and in your dashboard. |
| Default slot capacity | Pre-filled when you create a slot. Always overridable per session. |
| Minimum booking notice | How close to the start a member may still book. Set 1 hour and a class starting in 45 minutes is closed to them — but not to you. |
| Booking horizon | How far ahead members can book, up to a maximum of 30 days. Keeps a member from claiming every seat in next month’s schedule. |
| Late-cancel window | How close to the start a cancellation counts as late. Late cancellations are flagged and don’t return a pack session. Set 0 to switch the whole idea off. |
| Require active membership | On: only members with a valid plan and remaining allowance can book. Off: your schedule is open to anyone with the link. |
| Description | Shown on your booking page and used as your Google search snippet — worth writing as a sentence someone would search for. |
| Contact & links | Address, maps link, phone, website, Instagram and Facebook. They appear in your page footer. |
| Danger zone | Deletes the business permanently — every member, booking and setting. You have to type your business name exactly before the button unlocks, and there is no undo. |

Monthly stats
The Stats tab is a month of your business on one screen — enough to decide whether a class stays, moves, or gets a second sitting.
- The month at a glance
- New members, roster at month end, classes held, bookings made and no-show rate.
- Which days filled up
- Booked against offered seats for each weekday — your busiest and your quietest, side by side.
- Most active members
- Who came most this month, ranked by visits.
- What’s booking
- Per class: bookings, sessions held and fill rate — how full it actually runs, not just how often it met.
- Most visited slots & needs attention
- Your recurring time slots ranked by fill rate, with the consistently empty ones flagged for review.
-
1
Pick a month
The picker at the top goes back through your whole history, so you can compare this September with last.
-
2
Act on what needs attention
A slot that never fills is worth moving before it is worth dropping — a different time, or merged with the class next to it. A slot with a waitlist most weeks is worth repeating.
Tip: these are the same numbers as your 30, 90 and 365-day milestone emails — available on demand, for any month you choose.

Telegram alerts
Bookings and cancellations, on your phone, the moment they happen — without an app of ours to install and without paying for SMS.
-
1
Link Telegram from Settings → Telegram alerts
Scan the QR code with your phone, or tap the button to open Telegram if you are already on it. One tap on Start in the chat and you are linked.
-
2
Know when someone books
The session, the time, who booked — flagged if it is their first booking with you, or a spot claimed from the waitlist — and how many spots are left, or that the class just filled.
-
3
Know when someone drops out
A message naming the member and the session, flagged when it was a late cancellation, with how many spots are now open and whether the seat went to someone waiting. Cancelling a whole session alerts you too.
-
4
Choose which alerts you want
Separate switches for new bookings and for cancellations. Both start on; turn bookings off if your schedule is busy enough to make them constant, and keep cancellations — those are the ones you act on.
-
5
Ask the bot for your day
Send /today or /tomorrow for that day’s sessions with times and booked counts — for every business you have linked. Send /stop, or use Disconnect in Settings, to unlink.

Sign back in
There are no passwords on GettingBooked. Every sign-in is a one-time code, and a signed-in session lasts a week.
-
1
Choose “Sign in” on the home page
Enter the email address you used when you created the business.
-
2
Enter the 6-digit code
It arrives by email and is valid for 30 minutes. Ask for a new one if it lapses.
-
3
Every business on that email opens at once
Run two studios from one address and a single code signs you into both — each with a shortcut on the home page.
Tip: your session lasts 7 days. While it is live, going back to gettingbooked.app shows a Continue to your business shortcut instead of asking for anything at all.